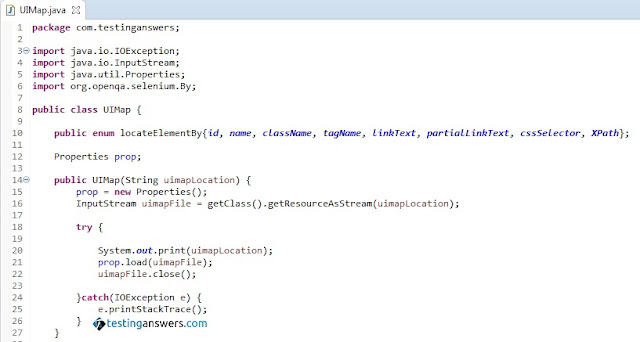
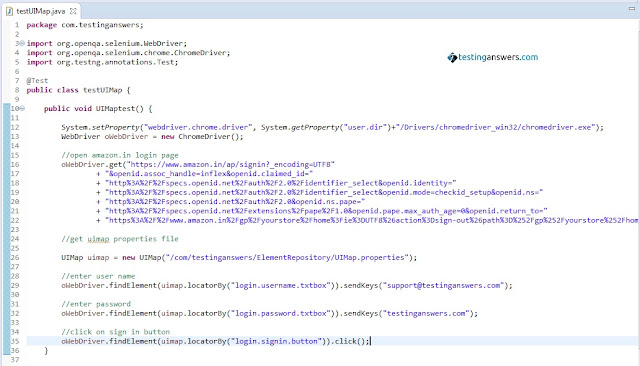
Selenium WebDriver API uses locator information to find elements on the page. Defining the locator information in the classes may result in duplication of element location information in various classes. Because of such duplication, it becomes increasingly difficult to maintain tests as the size of the test suite increases. Any change in element locator information requires updating of the element locator information in all the classes wherever it has been defined. Identifying classes which require an update and then updating them is a very time consuming and difficult task. In short, change identification and change implementation become a nightmare.
One way to solve this problem is to use the Page Object Model framework (Agile Automation Framework). In this framework, each page is used as a reusable class. All the elements of the page are defined in the same page class without any duplication. In order to avoid locator information duplication within the page class, the locator information is defined at the top of the page using @FindBy method.
Another way to resolve this problem is to create a repository which defines locator information of all the elements. This element repository is termed as Object or UI Map. A user interface (UI) Map helps in creating a one-point maintenance framework for elements' locator information.
UI Maps are easier to maintain. Maintaining all locator information in one place also helps to avoid duplication of elements' locator information. Whenever a change to a specific elements' locator information is required, it can be easily identified and changed in the UI Map. Making changes in one file is much simpler and easier rather than making changes in multiple files (class files or tests). Since changes are to be done in one file, change identification and change implementation are easier. Also, the UI Map can be version controlled.
17.1.1 | Creating Selenium Extension for UI Map using a properties file
In the following section, we will discuss how to extend Selenium WebDriver to develop a UI Map for amazon.in site login page. Firstly, a UI Map cab be any flat file or .properties file. Locator information can be defined as key-value pairs in the UI Map file. This UI Map cab be imported in all the page class files which need to interact with application front-end.
17.1.2 | Defining Locator information in UI Map
Let us first create a UIMap.properties file. The locator information can be added to this file as key-value pairs. Assume the format for the defining key-value pairs to be:
 |
| Defining Locator information in UI Map |
Now let us define the locator information for amazon.in login page.


